


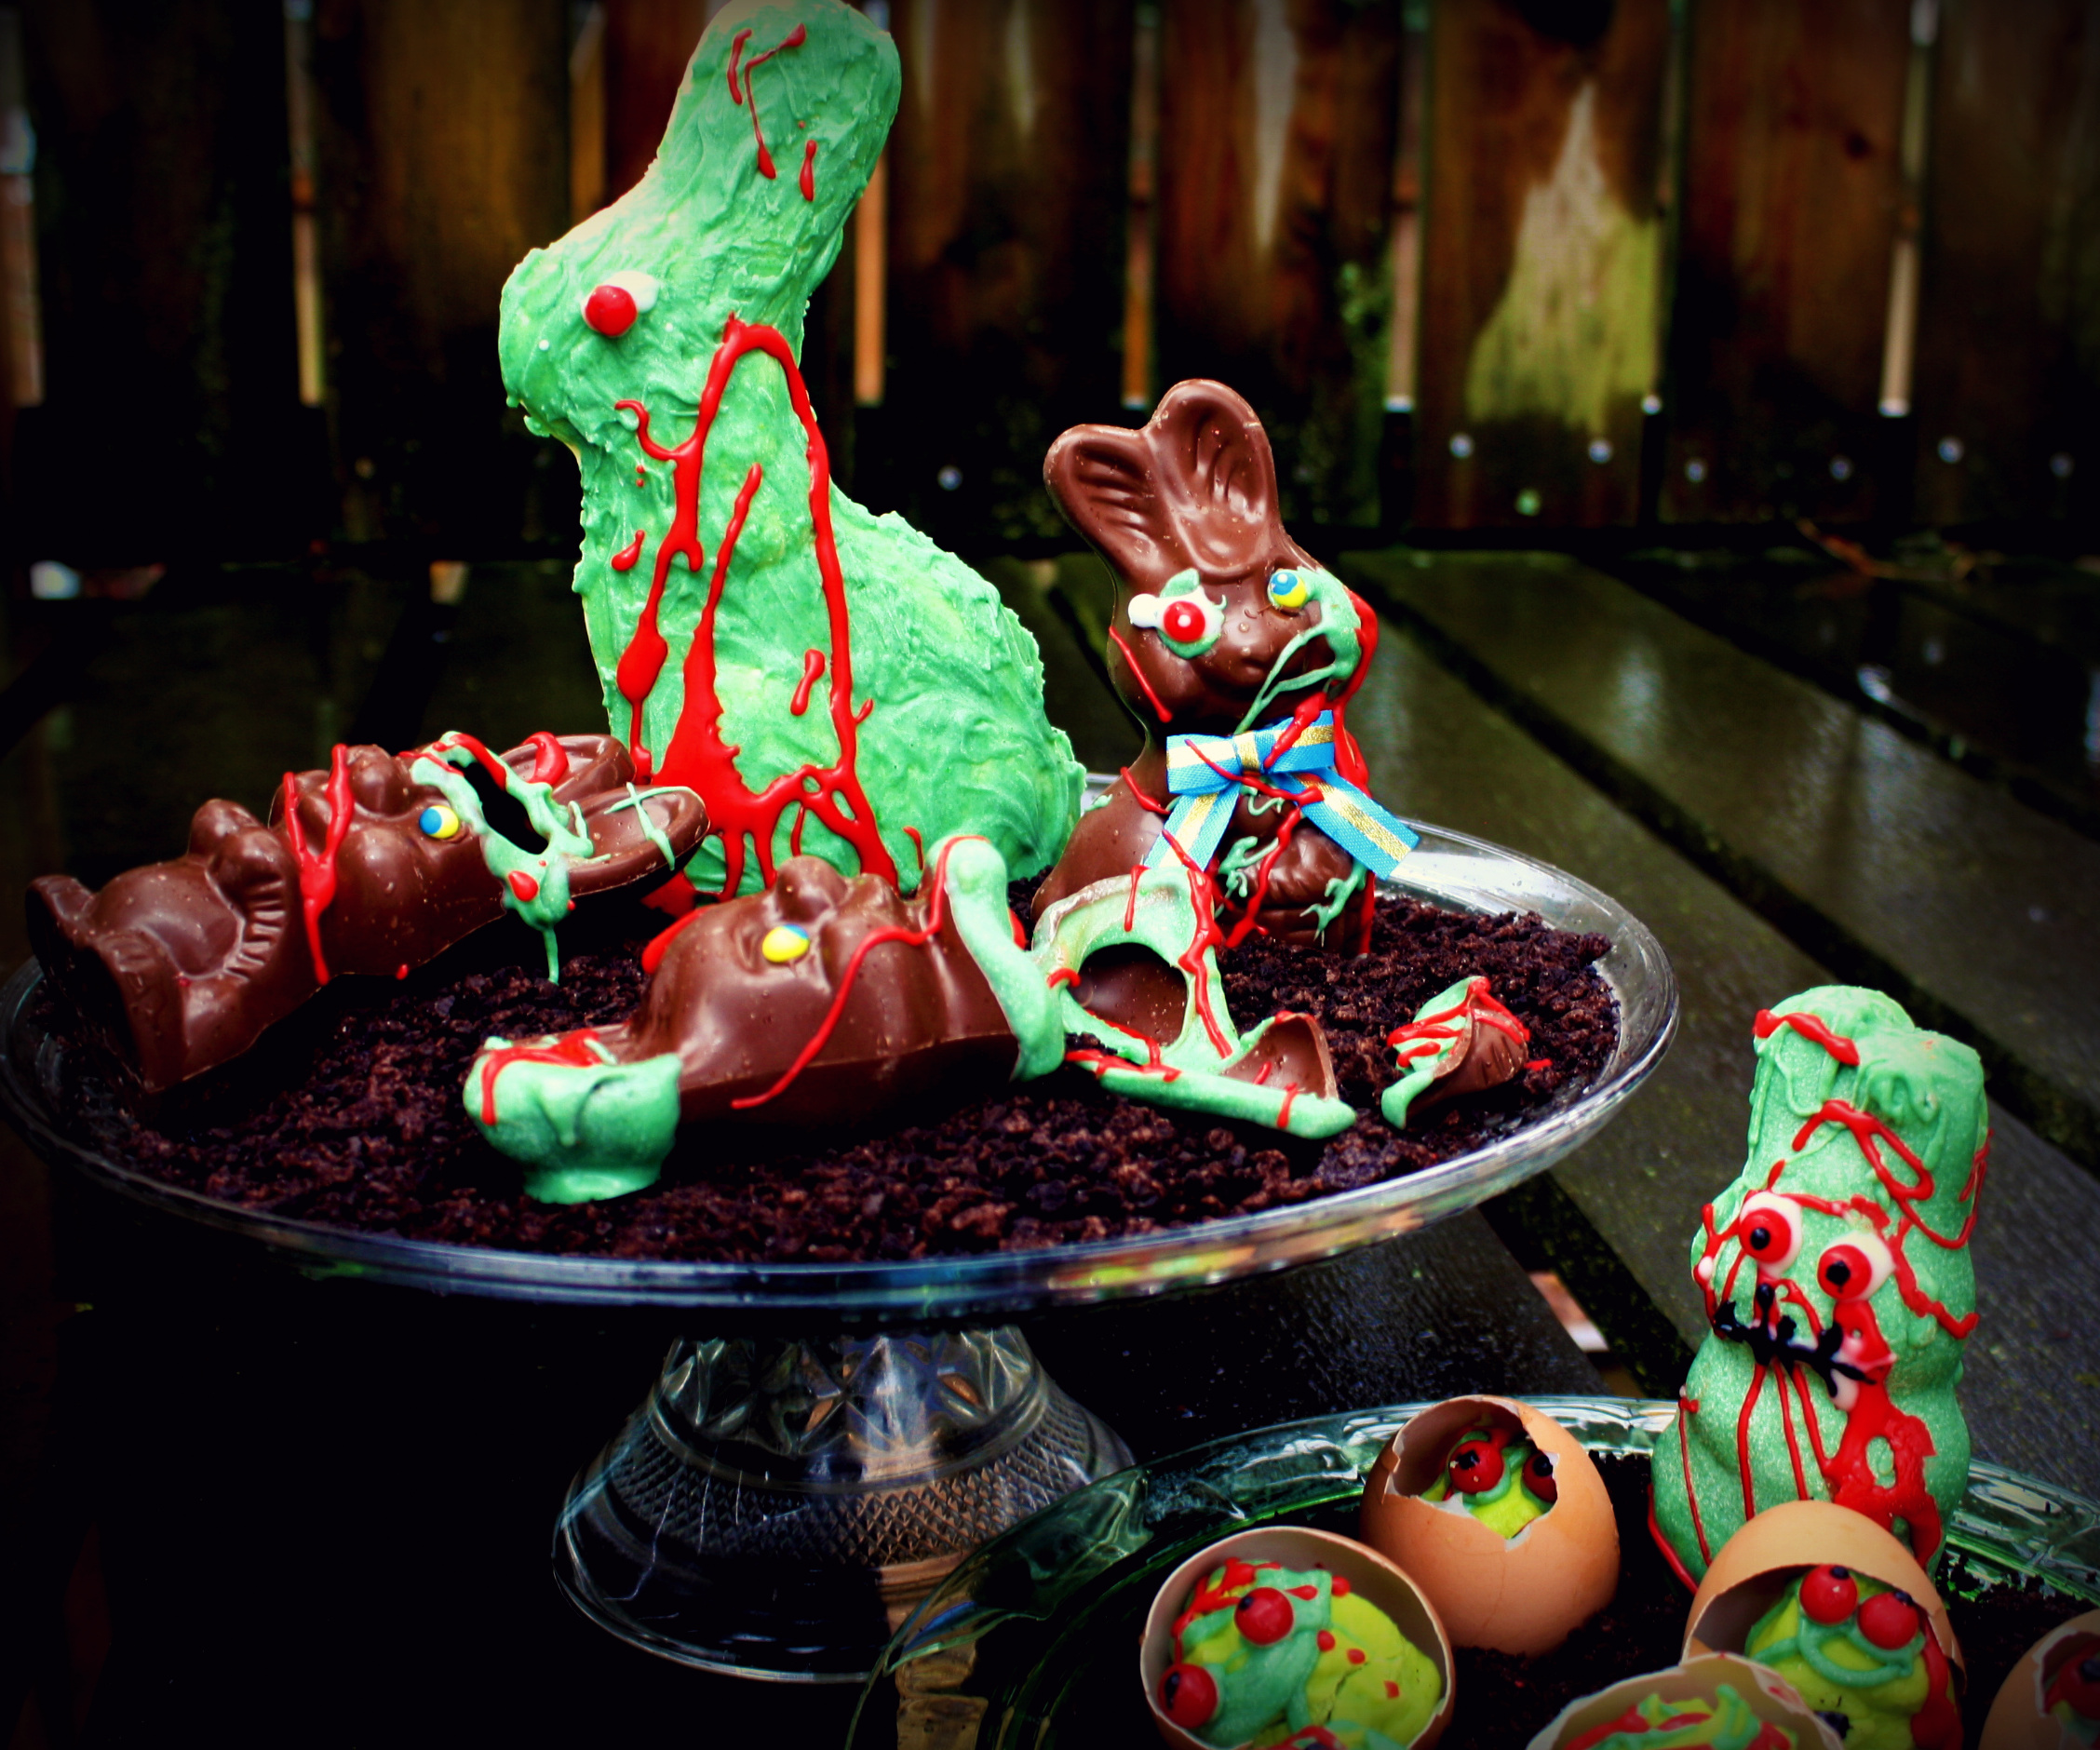
Technically this isn't a criminal craft, but zombies so frequently walk (lurch) that fine line that crooks and other miscreants get lumped into that featuring them on my blog doesn't feel like cheating. And while pairing zombies with a fuzzy pastel holiday might not be for everyone, at my house we find a little sprinkling of mutant monsters adds a bit of joie de vivre to almost any occasion, like a dash of Tobasco sauce for the psyche. One of my favorite on-line stores, Think Geek featured zombie bunnies but they sold out before I could get my order in. This gave me the perfect excuse to make my own. Since my tableaux featured bunnies in mid feed I bought a few that were already broken and the store gave me a discount. Zombies=thrifty. To make this craft you'll need:
Store bought bunnies one larger than the others-
1 bag white chocolate chips
New, clean paint brush
Green and red and black gel or powdered food coloring (NOT liquid)
1 Cup powdered sugar
Red hots
Oreos

To make:
Set a small pot of water to simmer on the stove- put the chips into a metal or glass mixing bowl that this slightly larger than your pot and place on top. What you are creating is a double boiler effect that will evenly melt your chocolate at a consistent low heat. Keep an eye on your chips, once they begin to melt you'll want to grab a hot pad to hold your bowl and whisk gently with your other hand- be ready to pull this off the heat if it starts happening to quickly. Add your green food coloring- This step is really important - DO NOT USE A LIQUID FOOD DYE, it will seize up your chocolate and you'll end up with a big green lump.
Once your color is mixed in, take a paint brush and coat the exterior of your bunny, if the chocolate gets too cool and hard you can always put it back over the simmering water. Let chocolate bunny cool completely. Break a couple bunnies in half or large pieces and dip the edges into the green chocolate
Next you'll be mixing up your icing- add water a few drops at a time to your powdered sugar until you have a slightly runny consistency, not as stiff as tooth paste instead, comparable to maple syrup. Add red food coloring to the icing. For this layer you'll be going for more of a splatter effect. Dip your brush in the warm icing and flick it across the bunny.

I used red hots for the zombie eyes, you can dip these in either the chocolate or the icing to stick them to the bunnies. From here on you'll be setting the scene- Toss your cookies into the food processor and blend at high speed or if you're old fashioned you can put them into a bag and break them up with a rolling pin. Dip the base of your big bunny into the warm chocolate and stick him on a serving platter. The extra chocolate layer will keep him from toppling over.
Spread the cookie mix on the serving platter and add bunny bits. I went a bit overboard on this part- When I tried making this the 1st time I forgot about liquid dye in chocolate and my 1st batch was a lump. Ever the inspired crafter, I took the rejects and shaped them into egg form, drizzled them with more chocolate and the red icing and added red hot eyes.
I've been collecting egg shells for cascarones and used some of these to nest the zombie eggs. So here's the absolute best part about this craft- I've still got a few days until Easter and if I sneak downstairs and start eating these bunnies before anyone actually sees them, no one will be the wiser- the more I eat, the more authentic it's going to look. So brilliant.

